Showing posts with label Desserts. Show all posts

Friday, June 24, 2011

Birthday Party Menu

My oldest daughter, Abby, just turned 4 this past week.  My husband decided we needed to have the party at our house instead of the local park.  He doesn't seem to think about the cleaning & planning that's required when it comes to having lots of family over - as opposed to the $5.99 carry out pizzas from Papa Johns I had originally planned to take to the park while still maintaining the usual "lived in" appearance of our home.  Since we just moved to our house last November and never really had people over for a party I figured now was as good as a time as any to take on the birthday party challenge.  Now you must understand that I don't take these things lightly - birthdays are a huge deal to me!  Hence I referred to my new favorite website, pinterest.  (On a side note, if you haven't checked this site out, you must...you will be just as addicted as me!)  They have all kinds of ideas when it comes to recipes, party planning, crafts...you name it!  So it came as no surprise that it was easy to find some great ideas for menu and food display ideas.

We started out the day with a special birthday breakfast - Mickey Mouse shaped pancakes with powdered sugar icing and sprinkles in lieu of the usual syrup.


After the diabetic coma had been lifted with lots of strong coffee, we then went to Abby's favorite place, Buckner Park, and brought along a Chick-fil-A picnic, also her favorite!  Here she is playing in the splash pad with her daddy :).  


The birthday party was later in the day and the menu consisted of your typical hamburgers, hotdogs, fruit, veggies, chips, and punch (nothing new), but food display was where I became inspired from my good ol' pinterest!


Rather than throwing some sliced veggies on a platter with dip in the middle, I found this genius idea to make individual veggie cups with ranch in the bottom of the cup!  For the fruit, I came across this idea to serve them in waffle bowls rather than one large serving bowl.


I also came across the really fun way of serving baked potatoes!  I baked some potatoes and laid them out with different toppings so people could customize their own.  The leftover baked potatoes have since been sliced up, pan fried in a little butter, and topped with all those delicious toppings you see in the picture...dee-lish!  I've decided pre-made baked potatoes are going to be a staple in our refrigerator since making these.


I got the recipe for the lemonade punch from my mother-in-law.  It's just one can of frozen lemonade concentrate mixed with a 2-liter of Sierra Mist.  I also borrowed the drink dispensers from her too...thanks, Holly!  The other thing of punch was raspberry sherbet mixed with Sierra Mist and filled with lemon, orange, and grapefruit slices.


Of course no birthday party is complete without the birthday cake.  So in honor of fulfilling Abby's desire to have a lemon cake, I used this recipe for delicious lemon cupcakes!  Here's my cute little birthday girl with her cupcakes...


While I'm no expert party planner by any means, getting some creative inspiration from online turned out to make planning this party a lot of fun :).  Happy party planning to you!


Monday, May 16, 2011

Ice Cream Mini Muffins

Did you know you can mix ice cream and self-rising flour then bake it to make delicious bread?!  I didn't either!  But you can...and it's amazing!!!  I came across the recipe for ice cream bread just last night and made a trip to the grocery store today for some ice cream.  I chose to make my bread into mini muffins instead of a loaf.  I do this most of the time with quick breads because they're easier to eat, they take 12-14 minutes to bake instead of 45-60 minutes, and they're just plain cute :). 

Here is what you will need:

2 cups ice cream (any kind you like)
1 1/2 cups self-rising flour (you can use all-purpose flour, just sift in 3/4 tsp baking powder and 3/4 tsp salt)

That's it!!!


Mix with a wooden spoon until just combined and spoon into a greased mini-muffin pan.


Bake at 350 degrees for 12-14 minutes.  You will have to eat one to make sure they're done as you can see by my finished batch :).


This is optional, but to me it makes all the difference: mix together a glaze of powdered sugar and milk (I don't measure this I just mix it until it's the right consistency). While the muffins are still hot and in the pan spoon a little glaze over each muffin.  Remove from the pan and enjoy :).


...and who says you can't have ice cream for breakfast?

Sunday, May 15, 2011

Cake Pops

I know it's been 3 months since I last posted anything on here, but I do have a good excuse!  I just finished up my first full-time semester since having kids...with all As at that!  So me and my nerdy self have a short break from school to share some yummy and fun recipes.  I have been cooking during my 3-month blogging hiatus, just never got around to letting anyone know about it...except of course my hungry family who would starve to death if I didn't cook every once in a while ;).  I have made some mac' & cheese cupcakes (that the kids will eat), the PERFECT potato soup (the recipe that I've always been looking for but somehow just found), and some other goodies that I'll share with you another day soon.  But today I must share with you my latest and greatest treat....cake pops!  I suppose I have Starbucks to thank for this obsession since I had never heard of them until they popped up on their menu one day (don't get the Tiramisu cake pop...it's NASTY!)  I was roaming the aisles of Target on Mother's Day and found the Bakerella Cake Pops recipe book on sale for $13.  In honor of Mother's Day I bought it for myself...I'm sure if my daughters were old enough they would've bought it for me :).  I just made my first batch of these tasty treats tonight using cherry chip cake mix, white whipped frosting, and dark chocolate candy coating.  I took step-by-step pictures to show you how I did it.

First you will need:
2 - 16 oz. bags candy coating (I only bought one and it wasn't quite enough)
1 - 18.5 oz. cake mix (any flavor)
1 - 16 oz. can ready made frosting (any flavor that goes with your cake mix)
sucker sticks
sprinkles/decorations
styrofoam block


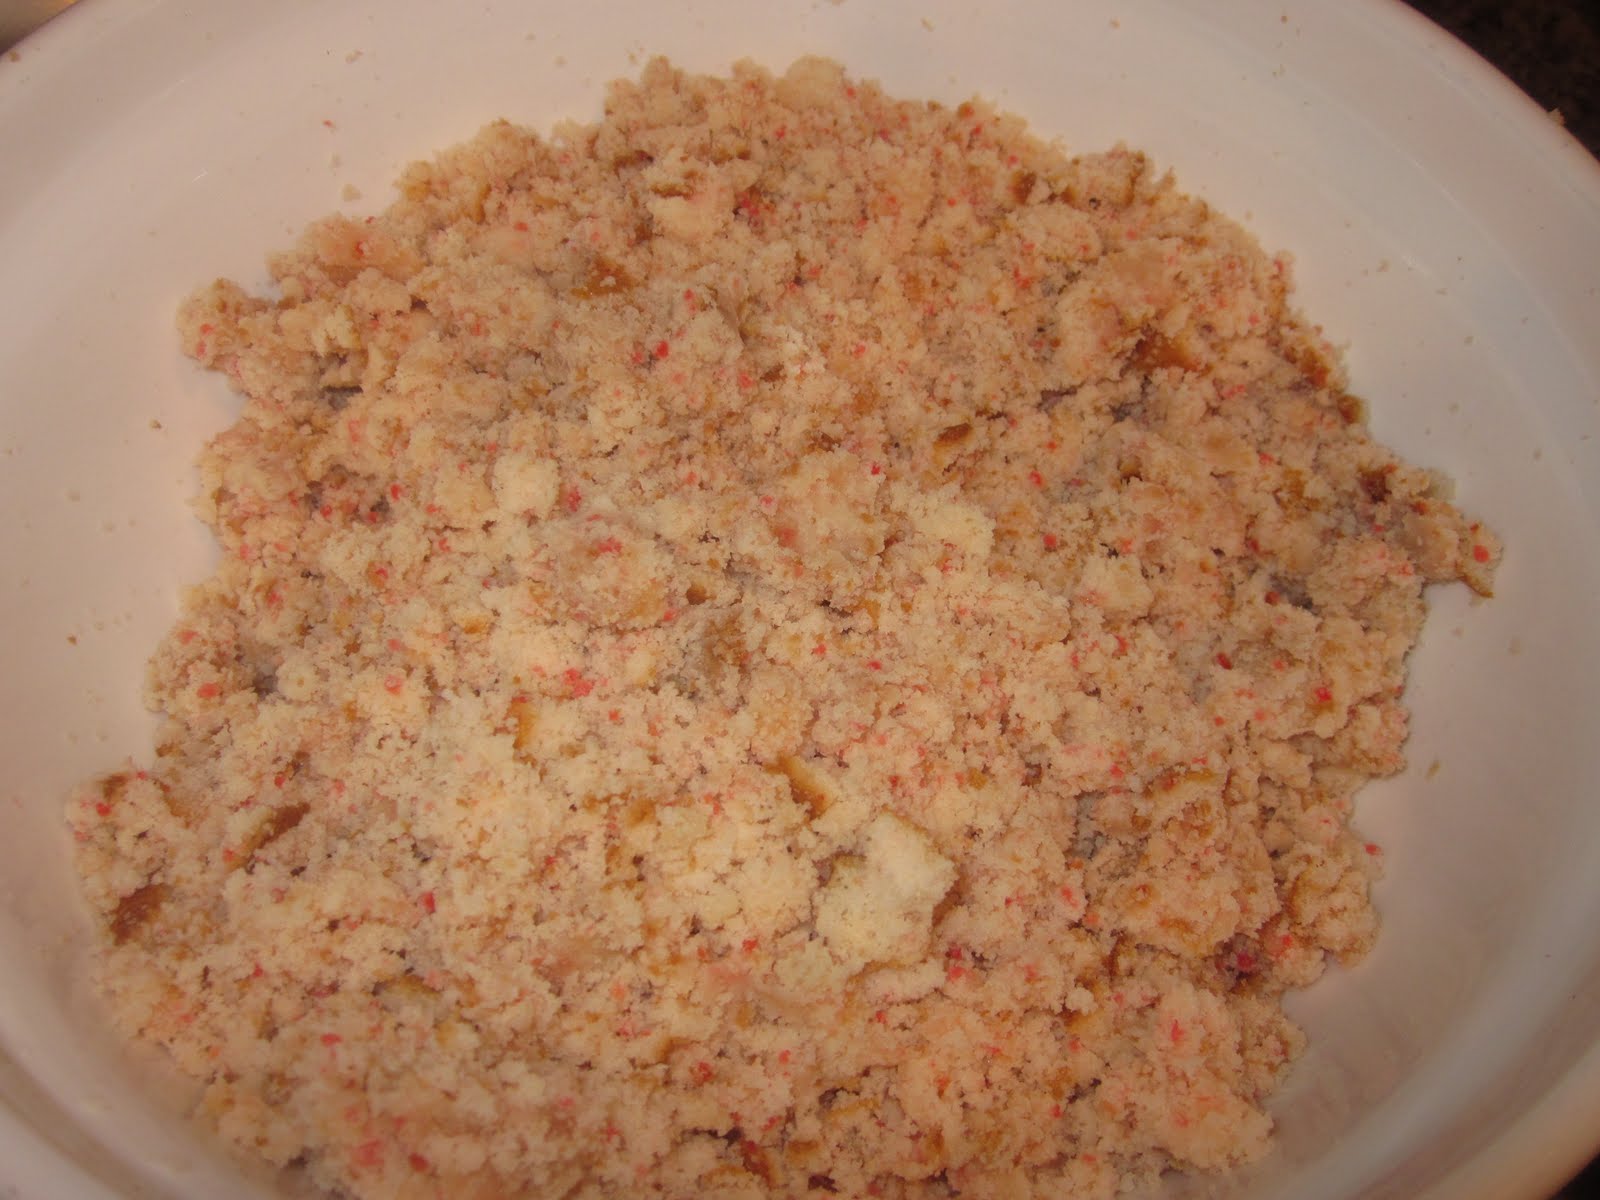
First you're going to bake your cake mix according to the box directions for a 13"x9" pan.  Once your cake has completely cooled you're going to crumble the whole thing up into a large bowl (my daughters I really liked this part).


Next you're going to get messy and mash in 3/4 of the can of frosting (not the whole thing) with your hands until it is well "mushed".


Now you're going to roll approximately 1 1/2" balls with your hands and lay them out on wax paper lined cookie sheets.  You should end up with about 48 cake bites, of course this depends on how much you nibbled on as you were rolling them...I ended up with 42 ;).


Cover with plastic wrap and place them in the refrigerator for several hours or overnight until they harden.  You can also place them in the freezer for 15 minutes instead (hmm...guess which one I did?)  Once they're done in the freezer place them in the refrigerator to keep them cool while you get your candy coating ready.  You'll want to use a smaller bowl so the coating will be deep enough to dip your cake pops into.  Microwave at 50% power for about 2 minutes, stirring every 30 seconds.  Take out your tray of cake bites and get out your sucker sticks.  Dip each sucker stick about 1/2" into the candy coating and push about halfway into the cake bite.  Once they are done, place them back into the refrigerator.


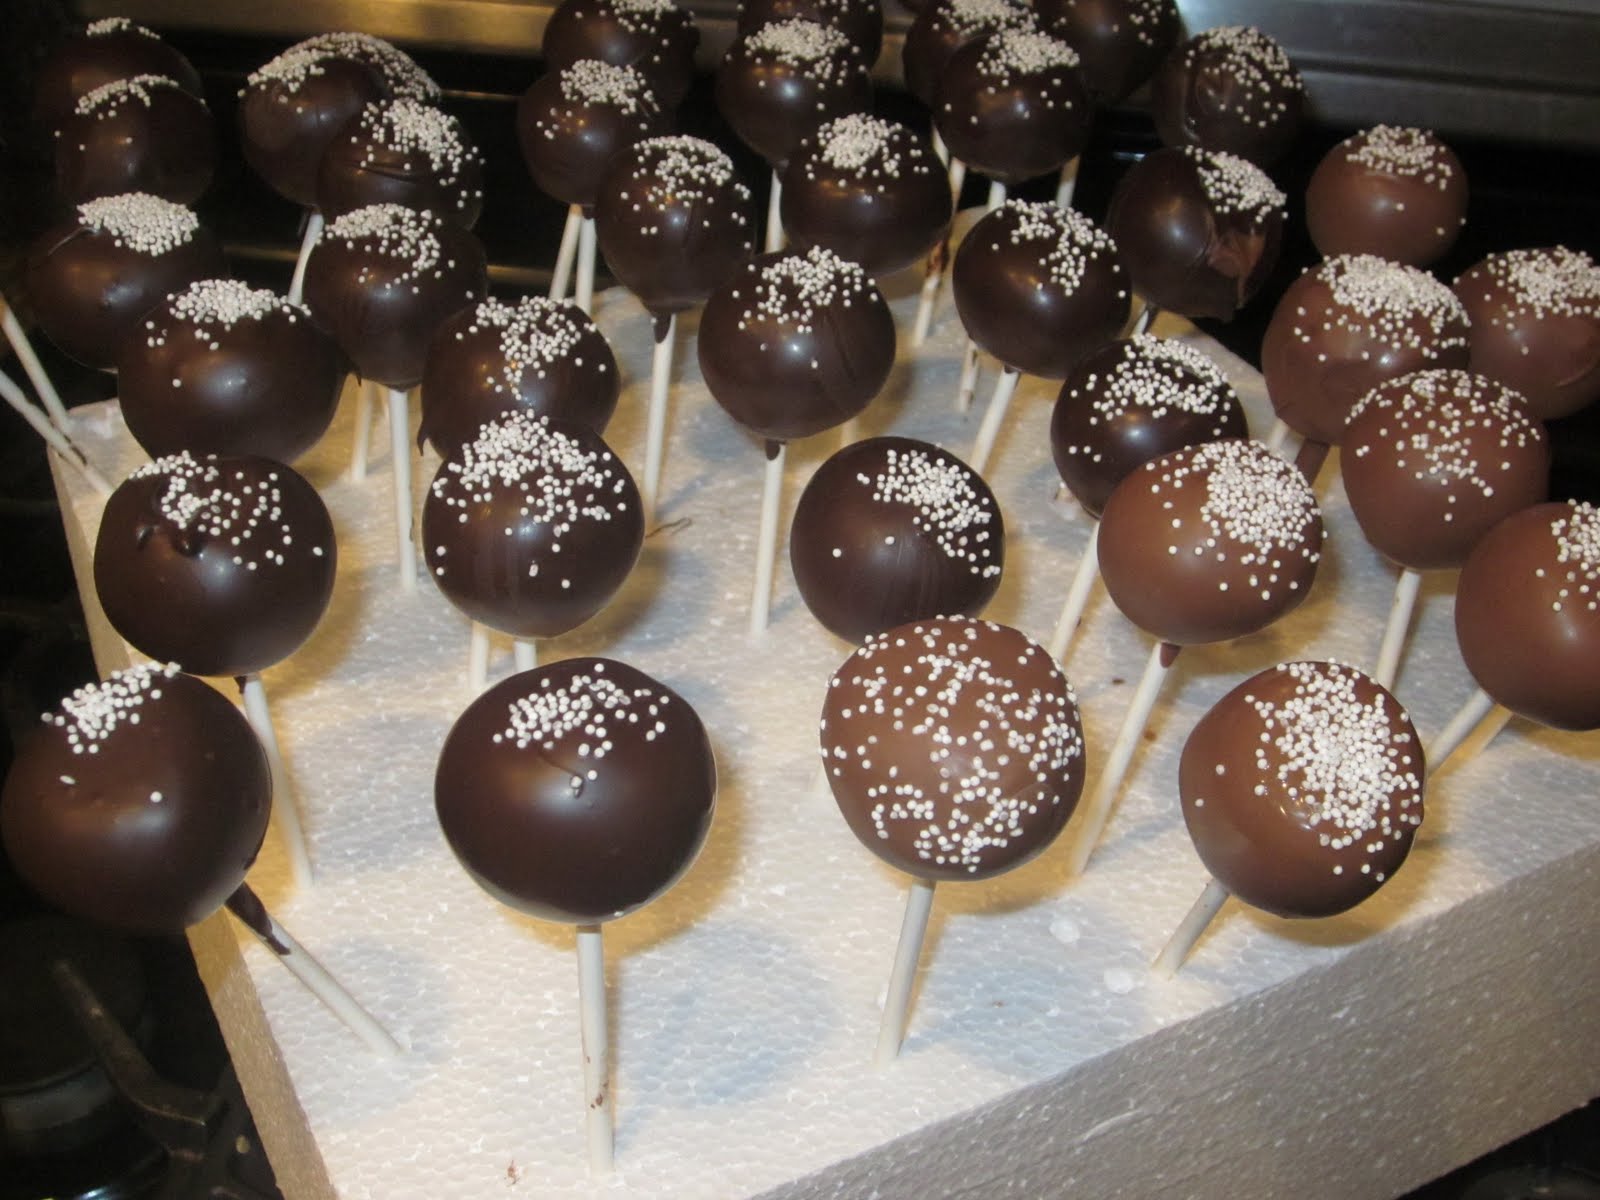
You may need to reheat your candy coating for about 15 seconds at 50% power to warm it back up.  If you need to thin your candy coating use about a teaspoon of vegetable oil or shortening, do NOT add water!  Take out a couple cake pops at a time, leaving the rest in the refrigerator so they stay firm, and dip once into the coating so that it covers all the cake (if you dip it more than once it will make it too heavy and your cake will fall off the stick).  Slowly pull it up.  While leaving it hanging over the bowl, tap your wrist with your other hand so that any excess coating will fall back into the bowl.


Put your cake pop right side up poking it into the styrofoam block to hold it up while it dries.  Immediately sprinkle any decorations you like on it before it hardens.  Repeat with the remaining cake pops and store in the refrigerator.


Last but definitely not least, ENJOY your cute creations!

Friday, February 4, 2011

Homemade Chewy Brownies

I was once again watching America's Test Kitchen (It's on Saturday on PBS at noon in case you want to tune in) and saw an episode about how to make the perfect homemade brownies! They did a blind taste test to see if people preferred homemade to box mix brownies, and surprisingly most people preferred the box mix! The comments were mainly that they liked the chocolate flavor of the homemade, but preferred the texture of the box mix because they are chewy. So the cooks in America's Test Kitchen set out to find a version that has the same texture as the box mix but the rich flavor of homemade, and they did! They found to get the chewy texture you need to use twice as much oil (unsaturated fat) as butter (saturated fat). I'm glad they know what they're doing, because I wouldn't have known that! These brownies are SO good and I'm sure you'll love them :).

Chewy Brownies

For the chewiest texture, it is important to let the brownies cool thoroughly before cutting. While any high-quality chocolate can be used in this recipe, the preferred brands of bittersweet chocolate are Callebaut Intense Dark Chocolate L-60-40NV and Ghirardelli Bittersweet Chocolate Baking Bar. The preferred brand of unsweetened chocolate is Scharffen Berger. Leftovers can be stored in an airtight container at room temperature for up to 4 days. 

Ingredients

1/3 cup Dutch processed cocoa (worth the extra $$$ at the grocery store!!)
1 1/2 teaspoons instant espresso or coffee (optional, enhances chocolate flavor)
1/2 cup plus 2 tablespoons boiling water
2 ounces unsweetened chocolate , finely chopped (see note at top)
4 tablespoons (1/2 stick) unsalted butter , melted
1/2 cup plus 2 tablespoons vegetable oil
2 large eggs
2 large egg yolks
2 teaspoons vanilla extract
2 1/2 cups (17 1/2 ounces) sugar
1 3/4 cups (8 3/4 ounces) unbleached all-purpose flour
3/4 teaspoon table salt
6 ounces bittersweet chocolate , cut into 1/2-inch pieces (see note)

Instructions
 1. Adjust oven rack to lowest position and heat oven to 350 degrees. Make sling using the following steps: Cut 18-inch length foil and fold lengthwise to 8-inch width. Fit foil into length of 13 by 9-inch baking pan, pushing it into corners and up sides of pan; allow excess to overhang pan edges. Cut 14-inch length foil and fit into width of pan in the same manner, perpendicular to the first sheet (if using extra-wide foil, fold second sheet lengthwise to 12-inch width). Spray with nonstick cooking spray. (I didn't do this part, I just used a greased, glass, 13x9 pan)
2. Whisk cocoa, espresso powder (if using), and boiling water together in large bowl until smooth. Add unsweetened chocolate and whisk until chocolate is melted. Whisk in melted butter and oil. (Mixture may look curdled.) Add eggs, yolks, and vanilla and continue to whisk until smooth and homogeneous. Whisk in sugar until fully incorporated. Add flour and salt and mix with rubber spatula until combined. Fold in bittersweet chocolate pieces.
3. Scrape batter into prepared pan and bake until toothpick inserted halfway between edge and center comes out with just a few moist crumbs attached, 30 to 35 minutes. Transfer pan to wire rack and cool 1½ hours. 
4. Using foil overhang, lift brownies from pan. Return brownies to wire rack and let cool completely, about 1 hour. Cut into 2-inch squares and serve.